Tuesday 30 April 2013

Makeup Haul : Darling Girl Cosmetics

If you follow my Facebook page, you probably know that I've ordered a few (well a lot actually) eye shadows from Darling Girl Cosmetics at the beginning of the month.

I've just received my package and I'm beyond excited! This is my first time purchasing from them so I went for the small sizes so I could try out of bunch of their colors. Mostly what grabbed my attention the most were the amazing duo chrome colors that they have!

Here's what I got
Will be posting looks using these very soon! So excited to try them out! 

---

Don't forget to follow me and like my Facebook page for more posts like this ♥

Monday 29 April 2013

10 Reason I'm Excited for Summer! ♥


April is coming to an end and may is just beginning. While summer only official starts mid June, may is the month where it gets warmer here in Quebec City, which makes me super excited for summertime!
---


Traveling 
I'm not 100% sure I'll be going backpacking this summer, but if not we will probably be going somewhere close like NYC and Toronto.

Wearing Shorts 
So many cute shorts I want to get :D

Warm Weather
Self explanatory!

School is Out
I have a summer trimester until late June, but after that I'm all free!

Neon colors
On my nails, on my clothes, everywhere :D

Going to the beach
I'm not the biggest beach bum out there, but nothing spells summer for me like the beach.

Good hair and Skin
More humidity means nicer hair and skin for me. Also, I take cool showers and don't heat style my hair as much during the summer so my  hair is super healthy.

Cool drinks & Ice Cream
Piña Coladas, Slush, Milk Shakes, yummy!

My hair gets lighter 

Outdoor fun
BBQ, diving, hiking, I love it all!

Check out my Summer Pinterest Board :D


Don't forget to follow me and like my Facebook page for more posts like this ♥

Sunday 28 April 2013

April 2013 Beauty Favorites!

Hey everyone! Now that April is over, it's time for monthly favorites ♥

April has been quite hectic for me with school and everything, so the month went by super fast. I can hardly believe may is just around the corner already! It's finally getting warmer here in Quebec City so that's definitely making me quite excited for summer. My trimester will be over in just a little over three days, but unfortunately, my summer trimester is starting next Monday :( 
---

Anyway, let's get started with my Beauty Favorites 
  I have quite a few new favorites to share with you all this month :) 

Neutrogena Oil Free Makeup Remover - This is a repurchase, just as gentle and efficient as I remembered! It works great with waterproof mascara too (which I have been into lately).

Equate Facial Cleansing Towelettes - I probably mentioned this a million times on my blog now. I just cannot get enough of these! I was super glad to get these again in April since I had run out and had to get by with another brand for a couple weeks. 

Samani Makeup Brush Cleaner - This is very new to me. I've never had brush cleaner before. I really like this, it gets the product out of my brushes instantly so I can use them to apply multiple colors.

L'Oréal Kids Tangle Tamer - Seems to work ok for detangling (my hair isn't all that tangly usually), but the smell is absolutely fabulous. It smells like yummy pears, it's awesome :D

Maybelline Great Lash Mascara in Clear - I've gotten into filling my eyebrows lately (especially if I'm going to take pictures, it looks a lot more put together). This is a cheap and efficient way to keep my brows looking tidy.

Rimmel Scandal'Eyes Kohl in Nude - I love this on the waterline. It makes your eyes look bright and awake. If I'm going for a natural look, I much prefer nude to white. This pencil is super creamy as well, I wish it came in more colors.

Bonne Bell Liplites - Not sure what this one if called but it's  a creamy medium pink color. It smells like vanilla cake, yummy!

NYX Eyeshadow Base in Nude - This is a great primer for eye shadow, it really helps the shadow stick to the lids. I also love that it is tinted because it hides all the little veins in my eyes.

Kiss 05 Lashes - These look great on. They're not too overpowering, but they're still long and dramatic! They're also super comfortable and light.

Sally Hansen Nail Polish in Pacific Blue - I've had this for a couple years now and it hasn't dried up. Love this color for spring :)

Urban Decay Naked 2 Palette - I bought two of these at the beginning of the month. One for myself and one for my giveaway. I have been using mine constantly. I love everything about it! I think I might do a full review about it soon, would you be interested in that? Let me know!

Lush Shampoo Bar in Seanik - I'm super impressed with this! The smell is very nice (even though I was skeptical at first, it seemed a bit salty for a hair product), it leaves my hair feeling super clean and weightless and it rinses off really well. To my surprise it lathers very well too. I love this.

---

And now my Favorite Accessories for this month

♥ Bracelets from Ardène (except the gold bracelet on the left which is from Suzy) - This month I have been loving the combination of gold, white and turquoise. It looks great paired with peach, pink and cream :)

Hair clip from Ardène - I got it from a surprise baggie (Yes my friends and I  still get those 2 for 5$ surprise bags because we're just like little kids :P) Usually we get mostly rubbish from them, (once my friend got an awesome owl necklace though) but this time I got this hair clip. At first I didn't think much of it, until I tried it in my hair. It's is so strong for it's tiny size I can't even believe it. I have a ton of hair and it can hold my bun all day, no hair bands or bobby pins required. I'm getting a million of these for sure!

Necklaces from Forever 21 - The first one is a dainty bow and the other one has an awesome feather on it. I love them because I feel like I can pair these with so many outfits!

---

That's all for this month's beauty favorites! What were your favorites this month? Let me know! I'm on the hunt for good Spring/Summer bright nail polishes :)

Don't forget to follow me and like my Facebook page for more posts like this ♥

Saturday 27 April 2013

Disney Makeup Series : Jasmine Inspired

Hello everyone! Today I'm starting a brand new makeup Series inspired by Disney characters. I'm starting out with one of my all time favorite Disney Princesses, Jasmine from Aladdin! ♥

I love Jasmine's independent and courageous personality and that's probably why I loved her so much as a child. I remember having a Jasmine costume which I loved to death. It even included her cute pointy slippers and awesome headband :D
---

Jasmine Inspired Makeup Look
I was inspired by the beautiful colors of her outfit and jewelry. I also chose dramatic luscious lashes since to me it was well suited for an exotic princess such as Jasmine.


Base
  • UDPP
  • NYX Jumbo Pencil - Milk

Eyeshadow
  • BH 120 Palette (1st Edition)
  • Naked 2 Palette
Liner & Lashes
  • Ardell 107 Lashes
  • Cover Girl Clump Crusher Mascara
  • Wet'n Wild Gel Liner - Black
  • Milani Liquif'Eye Pencil - Black

Which Disney character would you like to see next? Let me know in the comments below :) 

Disney Series Recap 


Don't forget to follow me and like my Facebook page for more posts like this ♥

Thursday 25 April 2013

My Little Pony Series : Sweetie Belle Inspired [Cutie Mark Crusader Edition]

Hello everyone! This is another of the My Little Pony Inspired makeup I've been making recently. Now that we've gone through most of the main characters, I thought I'd branch out and do a character that we don't see as often, Rarity's little sister : Sweetie Belle.

This one is in great part inspired by the cute shirt by two brothers got me for christmas ♥ I just had to do a Sweetie Belle look!

How cute is she? ♥

Full Face shot
And that's the T-shirt that inspired me :) Thanks again to both my bros for getting it for me, super cute :D


Close up of the makeup


 Products used :

Eye Bases

  • UDPP
  • NYX Jumbo Pencil - Milk

Eye shadow
  • BH 120 Palette (1st Edition)
  • Stila In the Lights Palette
  • Coastal Scents 88 Warm Palette

Liner & Lashes
  • NYX 109 Rebel Lashes
  • Covergirl Clump Crusher Mascara
  • Wet'n Wild Gel Liner - Black
  • NYX Jumbo Pencil in Milk

Check out other My Little Pony Looks : Rainbow DashTwilight SparkleFluttershyRarityPinkie Pie, Spike Applejack, Scootaloo, princess Celestia and Nightmare Moon

Don't forget to follow me and like my Facebook page for more posts like this ♥

Tuesday 23 April 2013

Beauty Products I Regret Buying

Today I have a bit of a less exciting post for you all, but I hope very helpful nonetheless. I will be talking about products I regret buying or that I was disappointed with. Some products were just purely bad in my opinion, others were just not suited to my skin tone or to my tastes.

I'm doing this so that you can all avoid these products if you have similar preferences as mine, that way you don't waste your money on products that won't work for you!

---

Skin & Hair

- Batiste XXL Volume Dry Shampoo : I have a full review on this here.

- Olay Oil Minimizing Toner : I don't know about the skin benefits of this product because I have never even used it. It really stings my eyes even if I close them when applying probably because it has a high alcohol content (which is very drying for the skin). As soon as I realized just how strong this is, I decided not to use it since I have sensitive skin.

- John Frieda Frizz-Ease Secret Weapon : this is a finishing cream for your hair. I don't get it though, even the slightest amount makes my hair look sticky and it doesn't really add shine for me.

- Tresemmé Fresh Start Refreshing Mist : I bought this thinking it would be somewhat like hair perfume. It really doesn't smell that great so I wasn't a fan. It looks like it's made to cover up bad odor in your hair which in my opinion should be solved by washing your hair, not trying to hide it with scent.

Lips


- Elf Beauty Book Lips Edition : None of these lip colors are very pigmented. The brush it comes with is rubbish and most of the shades just slide around on your lips. It also comes with a dry and scratchy brownish lip liner which I just threw away. Not a fan of this.


- EOS Lip Balm : I know this product is popular, but it simply doesn't do it for me. It's waxy and it doesn't apply very well. It doesn't absorb on the lips and just sits on top. I guess it's good if you plan on applying lipstick over it so that it doesn't slide around, but otherwise it doesn't do anything for my lips. It's cute and it smells nice, but that's about it.

- NYC Smooch Proof Lipstain : Applies patchy. Very drying to the lips. Don't really enjoy it.

- Revlon Colorstay Ultimate Lipcolor : Well obviously this is a vampy color which looks nice on some people, but it just isn't my cup of tea. It's very drying and doesn't stay shiny on the lips. It also goes into all the cracks of my lips. Not a pretty look especially since it's a dark color.

- Stila Lip Glaze : I love this color, but I hate the texture of this. It's incredibly sticky and thick and it smells kind of funny. I'm glad I got mine at Winners for 5$, I'd be bummed if I'd paid a bunch of money for this. I just cannot stand it on my lips. Oh, and the applicator isn't great either.

- Blistex Fruit Smoothies : Waxy and I hate the smell of this particular one.

- Nivea Lipbalm with SPF 30 : Very waxy, it's hard to apply since it's so thick. It also leaves a white, very unattractive residue behind. It's not moisturizing and it has an horrible texture. Probably the worst lip balm I have tried in a long time.

- Revlon Colorburst Lipstick in Baby Pink : I have nothing against the formula of this lipstick, my issue is only with the color I chose. It's too frosty and pale for my lips and it simply doesn't work.

- Wet n Wild Mega Lip Color in Just Peachy and Wine Room : Don't like the formula of these lipsticks. They are way too thick and matte. They are not moisturizing at all which means they get into the cracks of my lips and don't look too good. I don't like Just Peachy on me, but Wine Room is a pretty color.

Baby Pink, Wine Room, Just Peachy, Revlon Ultimate Lipcolor, Stila Lip Glaze, NYC Lipstain

Eyes

 - Annabelle Eye Kohl in Mercury : A sort of charcoal and silver mix, not a great shade for any look I think. The pencil is waxy and pretty hard so you have to press quite a bit on it to get any pay off. A definite no-no for the sensitive eye area in my opinion.

- NYX Crystal Liquid Liner : I don't know if mine was old or something, but it's been super dry and gross ever since I got it. Cannot even work with it. Very disappointed with that because I was quite excited to try out glitter liner and I usually love NYX.

- Wet n Wild Mega Eyes Palette in Island Blue : This is from the old collection of Wet N wild (old packaging and everything). The formula wasn't what it is now. The shadows aren't all that pigmented and they are quite chalky. I don't like the colors either, not sure why I bought this.

- Wet n Wild Fantasy Makers : These are cream shadows for their Halloween line. The quality isn't that great. They used to have a glitter film over top which just rubbed away. The also crease like mad. Can be used as a base in very small amount, but other than that I have no use for this.

- L'Oréal Voluminous False Lashes Mascara : I think this is a fiber mascara. I don't like the brush, the mascara is dry and it clumps like crazy. I really didn't enjoy the mascara, I don't think I used it more than 2 or 3 times total. I'll probably just toss it soon. Full review here.

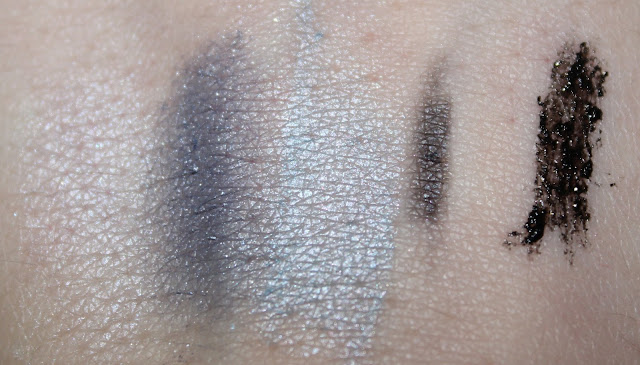
The Wet n Wild Trio, Mercury and the NYX Crystal liner which looks like a mess

Face

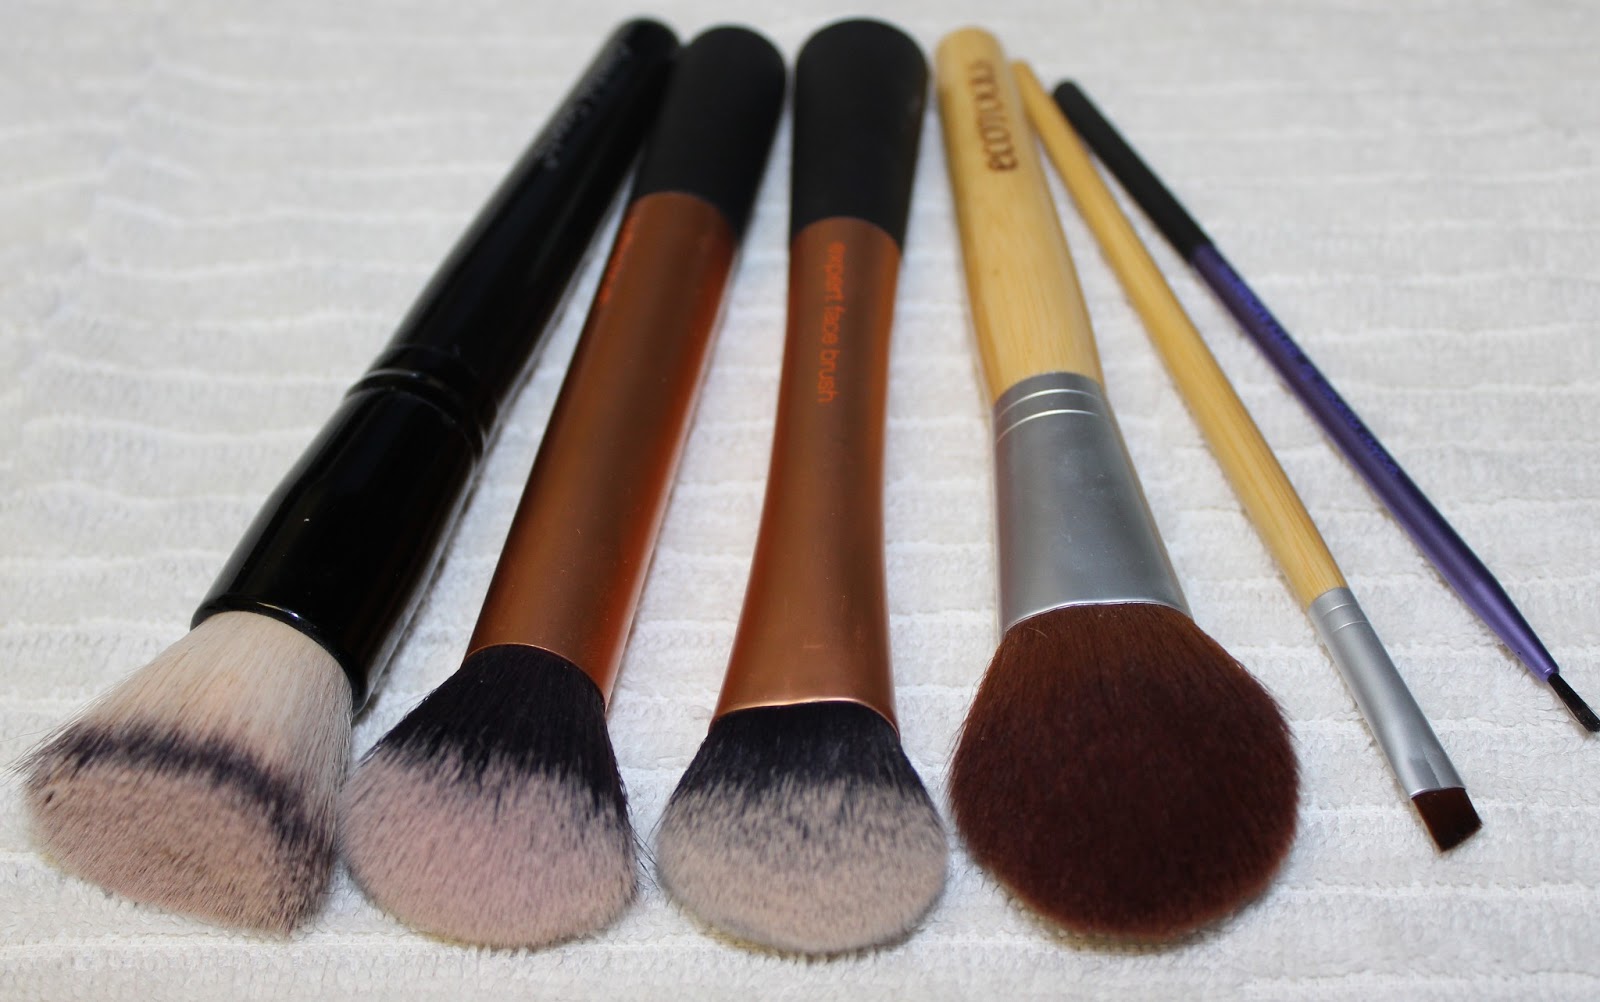
 - ELF Blush Brush : Now this is only a dollar, but I would still save my dollar instead of buying this. It's rubbish in my opinion. It's scratchy, it sheds on your face and it bleeds when you wash it. To make matters worse, the handle is coming apart and I haven't even been using it at all for the past year I have owned it.

- Hard Candy Sheer Envy Tinted Moisturizer : Well first off it's too dark for me, but that's my fault. Next, I think it's too thick of a consistency for a tinted moisturizer, it doesn't feel nice on the skin. Lastly it gave me an allergy reaction. I don't know what it is with Hard Candy liquid face products, but they don't agree with my skin.

- Revlon Colorstay Blemish Concealer : nothing terribly wrong with this concealer other than the fact that it has a grey tinge to it. It doesn't look too great on the skin.

---

Don't forget to follow me and like my Facebook page for more posts like these ♥

Monday 22 April 2013

Dramatic Navy and Yellow Cut Crease

Hey everyone, today I'm sharing a dramatic, intense look that I did the other day. It's got it all : colorful liner, cut crease and rhinestones. All that's missing is a little glitter (don't own any unfortunately).

This look was supposed to be in inspired by Snow White, but I got a little too excited and it turned out a lot more dramatic than I had intended. Therefore, I'm not going to use this for my Snow White Disney look. I am however super happy with the results (I'm so happy that the blending looks this good lol) so I decided to share it anyway!


Products used :

Base
  • NYX Eyeshadow Base - Nude
  • NYX Jumbo Pencil - Milk
  • Wet n Wild Gel Liner - Black

Eyeshadow
  • All eyeshadows are from the BH 120 Palette (1st Edition)

Liner & Lashes
  • Kiss 05 Lashes
  • Physician's Formula Organic Wear Mscara
  • L.A. Colors Grafix Eyeliner - Blue
  • Milani Liquif'eye Eyeliner Pencil - Black


This is kind of an unusual look for me since it's so intense, but I just love it! Let me know what you think! Would you like to see more dramatic looks like these? Let me know in the comments :)

Don't forget to follow me and like my Facebook page for more posts like this ♥

Sunday 21 April 2013

Beginner Series : Easy Lilac Eyes for Spring

Hello everyone, I'm back with another tutorial for my beginner series :)

This is a pastel, lilac with blue look inspired by a request I got on my Facebook Page. Thanks for the request Victoria, I love to know what you all want to see! ♥

I'm trying out a new format for my tutorial, a kind of collage inspired thing. Let me know if you like this and if this is easier to follow.

This is the look I'll show you how to recreate :


---

Material

---

Tutorial

Step 1 : Start with a clean surface.
Step 2 : Apply a white shadow base to the lid.
Step 3 : Blend out the base with your fingers.
Step 4 : Pat on a pale purple color to the first 2/3 of the lid.
Step 5 : Apply a darker Purple shadow to the outer corner in a triangular shape. Blend the two lid colors together slightly using the same brush.
Step 6 : Using a shimmery pale purple, highlight the inner corner.
Step 7 : Using a medium shimmery blue, blend out the dark purple and apply to the crease.
Step 8 : Apply a blue toned purple to the lash line.
Step 9 : Apply liner, mascara and falsies (optional).

--- 

That's all for this look! I hope you enjoyed it and that the tutorial was helpful :)
Don't forget to follow me and like my Facebook page for more posts like this ♥

Friday 19 April 2013

My favorite and Most Used Makeup Brushes (Drugstore)

Today I'm blogging about my favorite makeup brushes! I have accumulated quite a few makeup brushes in the past years, but I always end up using my favorites the most. I thought I would share with you all my most used ones. Some of them I have had for several years, while others are recent discoveries. They are all from the Drugstore (or from similarly priced stores) so they are all very affordable.

First, let me tell you more about my two current favorite drugstore makeup brushes brands.

---

Eco Tools : I have most brushes that Eco Tools does and I absolutely love them all. They are cruelty free and made from recycled aluminum and bamboo a widely renewable resource. The bristles are synthetic and extra soft. They don't shed or bleed, they are durable and they apply makeup very well. They are also very affordable. Some of their brushes are travel sized, which means the handles are very short. I personally like it since I think it gives more control and it's quite handy when you actually do travel with them.

Real Techniques : I have two sets by Real Techniques and two individual brushes. I love their face brushes which are very  dense and soft. The material is high quality and I love the look of the brushes. I also really love their fine liner brush. They are super affordable and they are made by Samantha Chapman a Youtuber from the beauty community. I love that by buying these we are supporting her amazing work! It's a definite bonus in my book.

---

Now on to my favorite brushes :
These are my most used Eco tools brushes that have a short handle. I use them on a daily basis

All by Eco Tools :
- Small detail brush : Inner corner and lower lashline
- Small flat shading brush : All over the lid color
- Fluffy blending brush : Blending shadows
- Large flat shading brush : Brow bone highlight
- Mineral powder brush : Powder, blush and bronzer

These are the only brushes I really need to bring with me when I travel.

These are my favorite long handle brush. I cannot get enough of the face brushes by real Techniques.

- Coastal Scents flat top buffing brush : Foundation
- Real Techniques buffing brush : Foundation and blush
- Real Techniques Expert face brush : Foundation
- Eco Tools blush brush : Powder, blush and bronzer
- Eco Tools angled liner brush : Brows and gel liner
- Real Techniques fine liner brush : Gel liner

---

That's all for my favorite makeup brushes! What is your favorite makeup brush brand? I'd love to try out Crown, as anyone tried out their products?

Don't forget to follow me and like my Facebook page for more posts like these ♥

Wednesday 17 April 2013

Easy Charcoal Smokey Eye Tutorial Using the Naked 2 Palette

Hello everyone! If you follow me on Facebook, you probably remember that I posted this picture a few weeks ago on my page. I asked you which look you'd like to see a tutorial for.

Most of you replied that you wanted to see the left eye so that's what I'm doing for all of you today!

I'll show you how to recreate this look

What you will need

How to


1. Apply a Dark base all over the lid using your fingers. I'm using Rich Mahogany Color Tattoo by Maybelline.

2. Pat the color Verve all over the lid using a flat shading brush. Also apply to the lower lash line going all the way in to the inner corner.

3. Using a fluffy brush, apply the color Tease in the crease using a windshield wiper motion.

4. Using the same brush, apply Busted to the outer corner. Blend into the crease focusing on the outer part of the eye.
Apply Foxy to the brow bone and highlight under the brows with Bootycall.

5. Line the waterline and upper lash line with a creamy black pencil liner.
Use Blackout to deepen the lower lash line a little bit.
Highlight the tear duct area using YDK.
Next, add mascara and false lashes (optionnal).

That's it! It's a pretty simple look to recreate, but I love how smokey and seductive it looks! I adore this palette because it's really versatile. Don't forget to enter my Naked 2 Giveaway for a chance to get one of your own! It's open until the end of April.

 Don't forget to follow me and like my Facebook page for more posts like this ♥

Monday 15 April 2013

Beauty Review : Batiste XXL Volume Dry Shampoo

Hey everyone! Today I'm back with a dry shampoo review! If you've been following me for a while, you probably know that I like to use dry shampoo quite a bit, especially when I'm travelling. It's great for a quick pick me up when your second day hair doesn't look as fresh as you would like it to be.

I've tried out a few different kinds (in fact I've just got a new one from Lush recently. Check out my haul). Today I am reviewing a fairly new product (at least to me), from Batiste.

It's the XXL Volume Dry Shampoo. It's a little different from other dry shampoos that I have tried since it is really geared towards volumizing.

I got this at Winners. I would have gotten the price sticker out for you, but it actually peeled the can's color off.
---

Review :

Pros : Definitely volumizing. The volume stays in your hair for the whole day and if it starts to fall a little flat, you can lift it up by just passing your fingers through your hair near the roots. It also doesn't smell as chemically as most dry shampoo do. It's inexpensive and I love the look of the can.

Cons : To me, it doesn't help soak up the excess sebum that much. The product's emphasis on volume is so strong, that I think it doesn't work that well as a dry shampoo. In fact, it gives a sort of static cling kind of feel to your roots when applied (similar to other volumizing powders I have tried). Personally I'm not very keen on having that kind of texture in my hair, but I know some people swear by these powder for adding volume to their crown.

Also, the smell is quite floral which could be a pro if you're into that, but for me, it's a bit off putting.

Lastly, I think it leaves a quite obvious white film behind in your hair. It's a lot more noticeable than any other dry shampoos that I have tried. I think it's even worse than baby powder.

This is how white it gets when you spray it on your hand. My other dry shampoos don't do that.

Overall : not a product I would recommend as far as the dry shampoo side of things. If you are looking for volume and if you have light hair, then this could work for your. Otherwise I wouldn't recommend it and I won't be purchasing this again. I usually like Batiste Dry Shampoos, but I would pass on this one.

---

That's all for this review! Let me know what products you would like to see a review for on this blog. :)

Don't forget to follow my blog and like my Facebook page for more reviews like this one!

Saturday 13 April 2013

Beauty Haul : Lush, Urban Decay, Ardell, OPI

Hey everyone! Today I went shopping with a friend of mine and I got a few goodies while we were there! I thought I would show you what I got in case some of your are interested in reviews on the products I have got there :)


First we went to Sephora. I got the small size of the Urban Decay All Nighter Spray to try out. This is the first setting spray I will be trying out. Let me know if you would like a review on that! I also got the Naked 2 Palette for my current giveaway. Actually I got two of them, I treated myself to one as well to reward myself for my two years in blogging! I will be giving away the other one at the end of the month! Don't forget to enter my giveaway if you are interested! ♥

Then we went to an hair care shop. I got a mini OPI top coat to try out and  a pair of lashes by Ardell. They are from the Cirque du Soleil Collection. They're really unique and pretty, cannot wait to try them out.

Last we went to Lush. This is my first time trying out lush and I'm quite excited. I wanted to try out their shampoo bars and I kind of got sucked into buying a few more things.

I think my friend Frederika from French Gypsy will be glad that I finally caved in and decided to try Lush products. She's been telling me how great they are for years now!

So I got the Seanik shampoo bar, the Avobath bath bomb and the No Drought Dry shampoo (which has a different name here in Quebec city). I also wanted to try their hair balm, but I'll wait a little bit before I do because it was a little expensive.

---

That's all I got today. Don't hesitate to let me know if you'd like to see reviews on any of these. Also, let me know if what you think of these products :)

Don't forget to follow my blog and like my Facebook page if your enjoyed this post ♥

Thursday 11 April 2013

Beginner Series : Easy Wearable Smokey Eye Tutorial

Hello everyone. Today I have an easy smokey eye tutorial for you all! To make it even easier for beginners to follow, all the products I'm using are from the Beginner drugstore Starter Makeup Kit I have posted a few days ago. That means that the look uses minimal products and is very affordable. Therefore anyone can achieve this easily! Let's start with the tutorial :)

In this tutorial I'll show you how to achieve this
easy smokey eye look!


For this look, I'm using the Wet n Wild Silent Treatment trio. It's the perfect everyday smokey eye in my opinion. 

This is an easy tutorial, in fact I'm using the color exactly how the company suggests you use it. The taupe on the lid, the dark brown in the crease and the pink for the brow bone.

Keep reading if you would like to learn how to achieve this super easy smokey eye! ♥

---


Step 1 

Using a flat shading brush, apply the purple-taupe color all over the lid. The ideal way to apply this color to get it to be saturated and as pigmented as possible is to apply it using a patting motion. You can prime the eye using concealer underneath to get an even better result. Don't go all the way up in the crease, really keep the color concentrated on the moving part of the lid.


 Step 2 

 With the same brush, apply the color to the lower lash line going all the way to the tear duct.


Step 3

Using a fluffy blending brush, apply the dark brown using a circle motion. Concentrate most of the color in the outer part of the lid. Gradually bring the color into the crease and then using a windshield wiper motion, bring the color forward. Clean the brush using a tissue and the start blending the edges again with the same technique. Try not to bring the color up too much.


Step 4

Clean off the remaining taupe shadow from the flat shading brush. Now using the pink shimmery color from the palette apply the color to the brow bone area. You can also apply it to the tear duct area to make the eyes looks brighter, bigger and more awake (se the same brush for that process as well). In this tutorial, I chose to highlight the tear duct.


Step 5 

Using a soft black liner pencil, line the upper lash line as close as possible to the lash line. Bring the liner about three quarters of the way in. It doesn't have to be perfectly smooth at this stage. Then, using an angled brush, smudge out the liner to make it even and a little softer. The end result should be subtle. You want to accentuate the lash line to make your lashes look fuller, but you don't want the liner to be obvious for this look.

I'm using Milani Liquif'Eye liner for this step.
It will set it you let it sit for a while, but it is soft
to begin with, which allows you to smudge it out a bit.
This is the brush I'm using to smudge out the liner

Step 6

Add your favorite mascara to the upper and bottom lashes to finish up the makeup. I have chosen the Cover Girl Clump Crusher Mascara for this look. You can also conceal underneath your eyes now if you hadn't before. I recommend waiting after your done to do it since you might get some fallout with the darker Wet n Wild shadows.


---

Here is the finished look ! It's quite subtle and wearable for a smokey eye which is what I love about this palette. It's easy and great for everyday!


That's it for this tutorial! Let me know in the comments if you have any other suggestions on beginner tutorials or tips you would like to see.

Don't forget to follow my blog and like my Facebook page if you enjoyed this ♥


LinkWithin

Related Posts Plugin for WordPress, Blogger...