

- Brow powder that matches your brows. I believe if you have light hair you need to go a few shades darker and if you have dark hair it's the opposite, but don't quote me on that! For my color, I went with trial and error. I use this Milani Brow Fix Kit and I mix both brown colors to achieve a color that I like.
- An angled brow brush. I like to use the one that comes with the kit, but you can use any one that you have.
- Tweezers
- Clear brow gel, I like to use clear mascara for this purpose. As you can see mine is starting to look brown and gross, but it's still works the same.
- A brow comb
- A shimmery highlight shade
How to Fill In Your Eyebrows
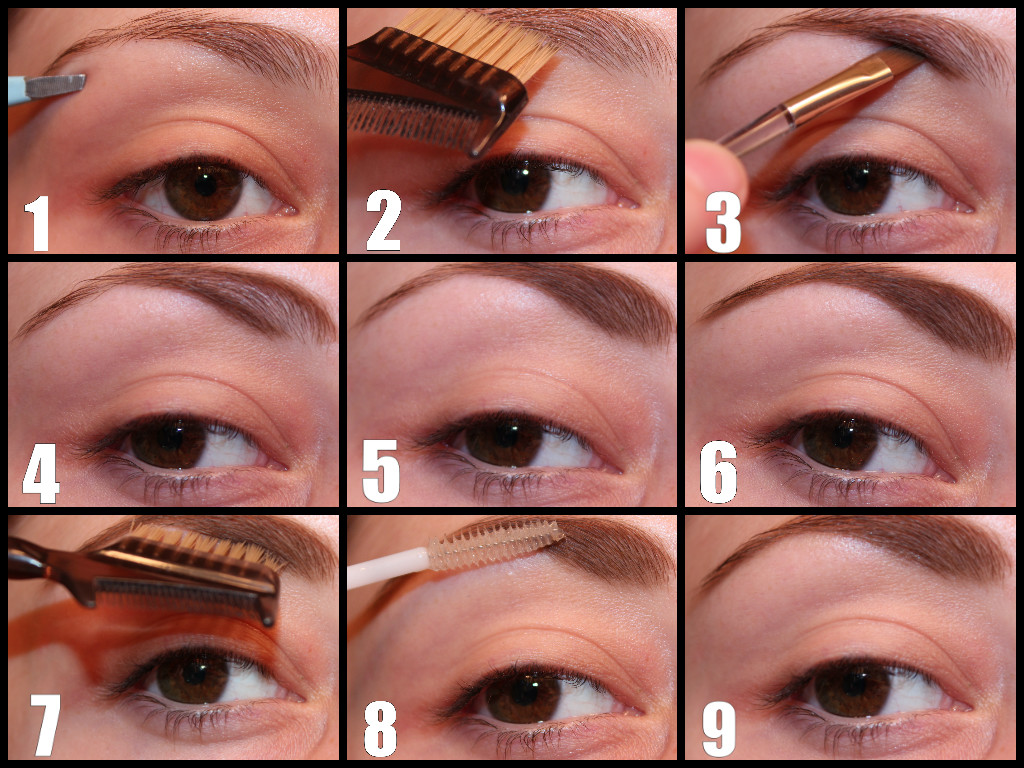
1) Tweeze any stray hairs.
2) Comb the lashes so that no hair is sticking out.
3) Using the angled brush and the brow powder in your chosen color, start filling the brow at the base on the brow. I like to fill in the front on my brows first and the tail last because that's where I apply the most product. Use short strokes to get the effect of hairs.
4) Using the same technique, now define the upper portion of the brow.
5) Fill it in.
6) Finish by filling in the tail of the brow.
7) Brush the eyebrows into place again. This will help reduce the appearance of drawn on brows and make it look more natural by getting rid of any excess product.
8) Using the brow gel, apply a small amount to the brows to help seal the product as well as keep them in place during the day.
9) This last step is optional, but if you want to further define the brow, you can use an angled brush and apply a light shimmery shade close to the brow on the brow bone.
---
That's all! You're brows are now groomed and ready for the day. Pretty easy right? Let me know if this tutorial was helpful to you!
Don't forget to follow me and like my Facebook page for more posts like this ♥

No comments:
Post a Comment